How to Sync Calendar with MS Outlook using CalDAV Synchronizer
Microsoft Outlook does not provide built-in CalDAV support. To sync your CalDAV calendar, you will need the third-party connector. Below we will describe how to use Outlook CalDav Synchronizer to sync the CalDAV calendar.
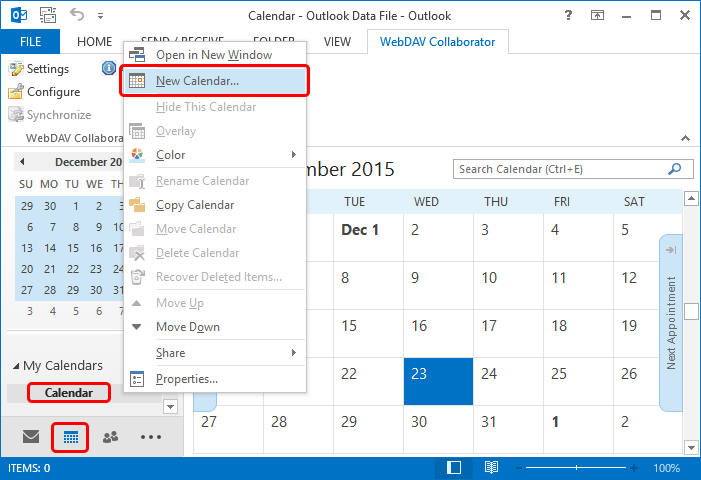
First, create a new calendar. Go to Calendars, right-click on Calendar node, and select New Calendar in the context menu.
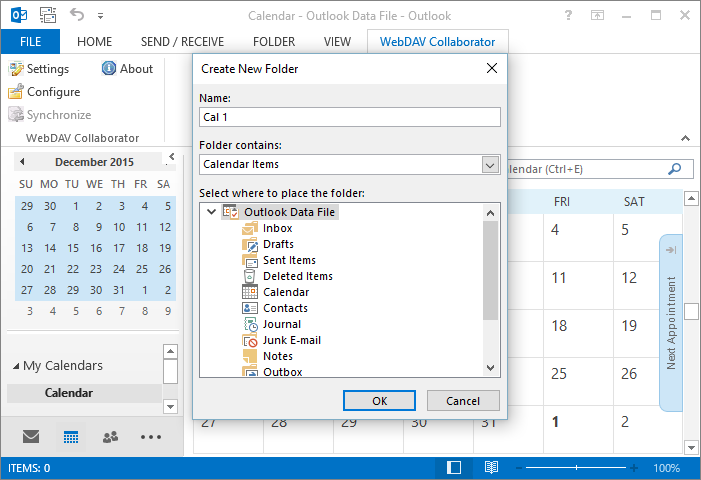
Provide the new calendar name and specify the location of your new calendar. In the Folder contains drop-down select the Calendar Items. Select OK:
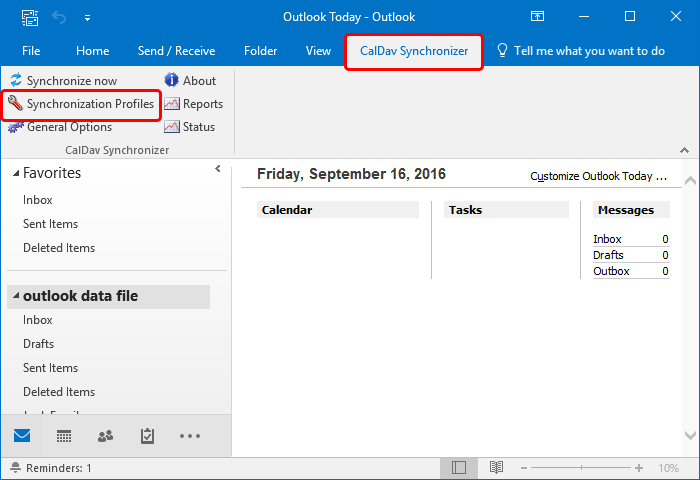
Now go to CalDav Synchronizer tab and select Synchronization Profiles:
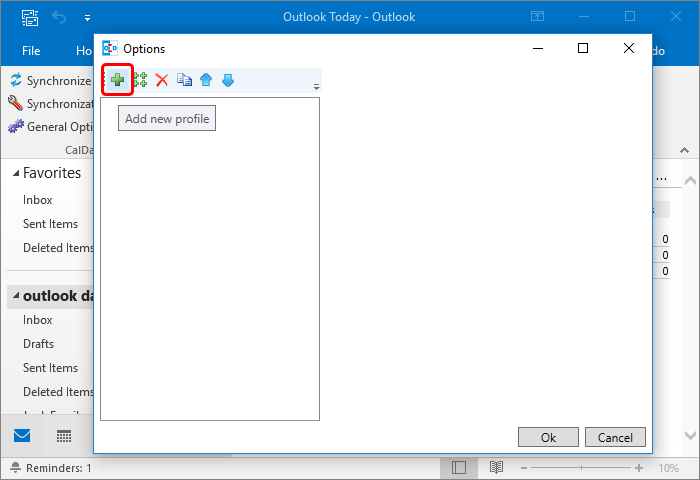
In the Options dialog select Add new profile:
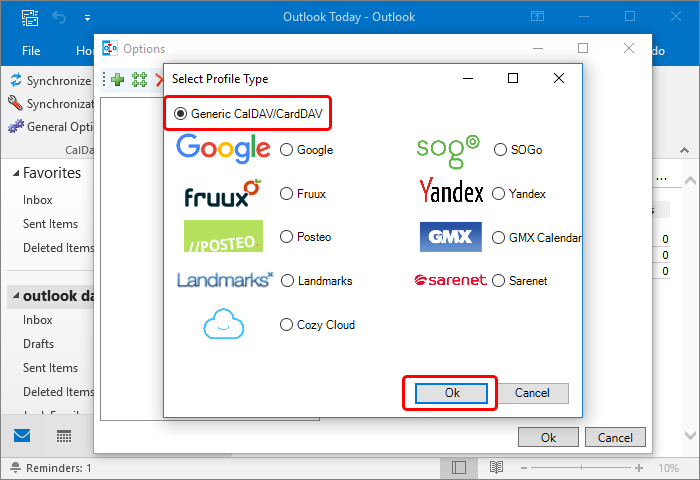
In the Select Profile Type dialog select Generic CalDAV/CardDAV:
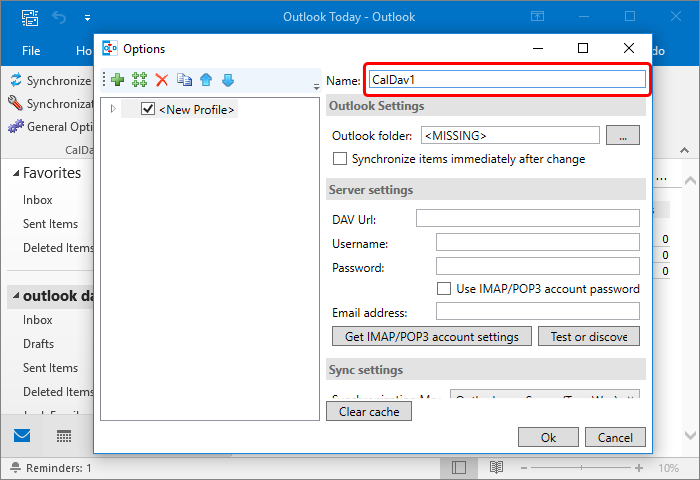
Fill in the name of Profile
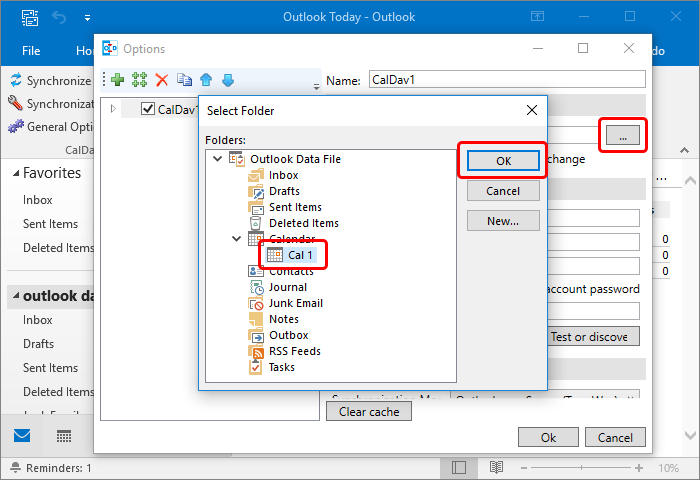
In the Outlook Settings select the Outlook folder that you have created above:
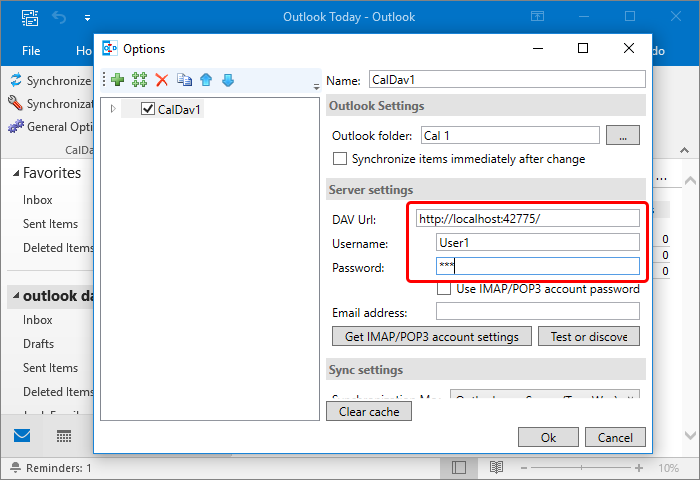
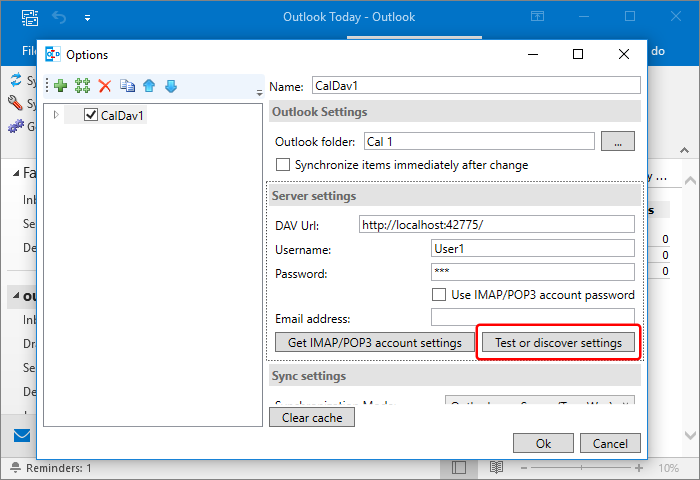
Fill in the Server Settings. In the DAV Url field provide your CalDAV server. Outlook CalDav Synchronizer supports discovery, you can provide just the server domain. In the User name and Password, fields provide your credentials.
It is strongly recommended to use an SSL connection to secure your data and credentials.
Select Test or discovery settings.
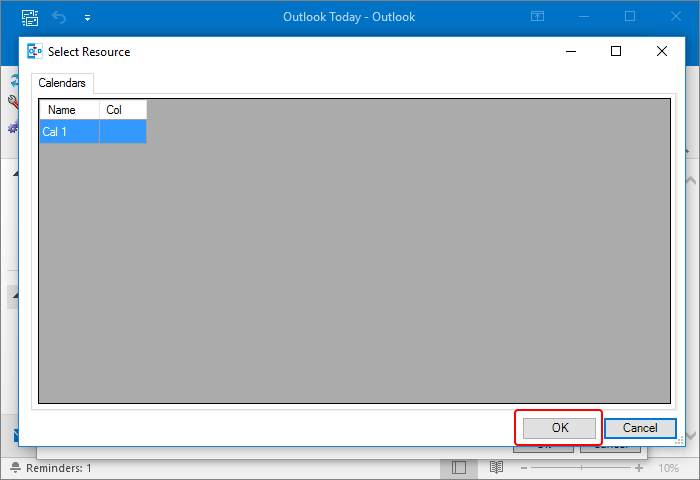
In the Select Resource, dialog selects OK.
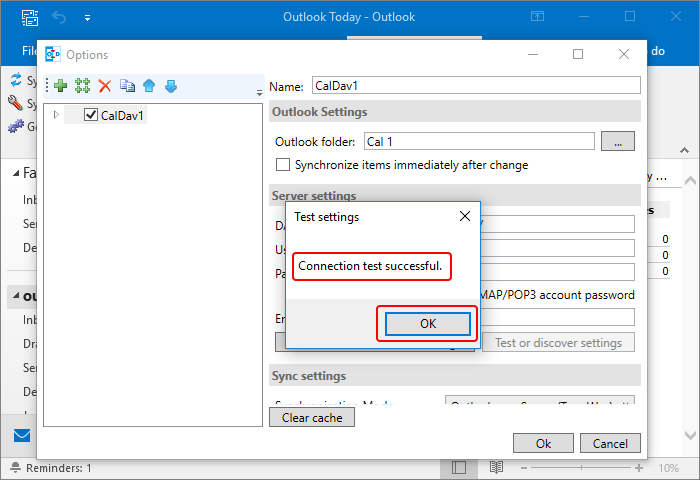
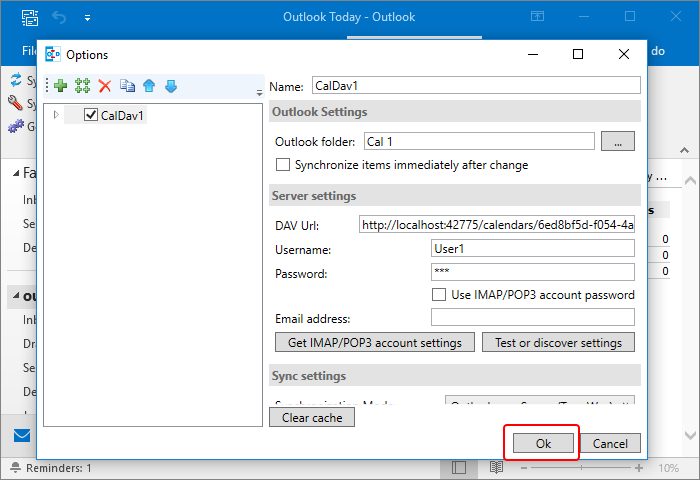
You will see 'Connection test successful' message. The Server Url field will now display a full path to a calendar.
Finally, select OK
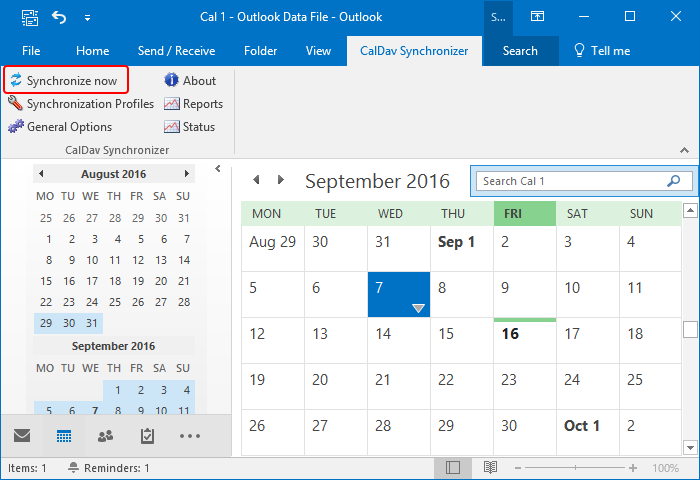
The synchronization does not start immediately. To start the synchronization manually select Synchronize now on the CalDav Synchronizer tab.
